Pour on gravel binder is a simple, transformative surface treatment that turns loose stones into a neat, usable finish. A single application binds gravel into a stable, permeable layer that improves kerb appeal and reduces dust and migration on driveways, paths and patios.
The primary purpose of a pour on gravel binder is clear: to stabilise loose surfaces and create a long lasting resin bound gravel finish that still allows rainwater to drain through. For homeowners and landscapers across the United Kingdom, the result is a durable surface suited to everyday car traffic, garden walkways and light commercial areas.
There are practical benefits that matter. A bound surface cuts maintenance, keeps stones in place and reduces mud and tracking into the house. Product options and DIY guidance are available from theresinbondedslabcompany.co.uk for those who want to explore specific systems and supplies.
This article will explain how pour on gravel binder differs from resin bound gravel, outline the benefits, walk through the step-by-step installation process, and advise when to DIY or call in professionals. Early considerations include careful base preparation, the sensitivity of application to wet British weather, and the environmental advantage of a permeable, eco friendly gravel binder solution.
What is pour on gravel binder and how it differs from resin bound gravel
Pour on gravel binder is a practical way to refresh a driveway or path without lifting the existing surface. It is a liquid resin solution designed to be poured or squeegeed over loose aggregate so the resin penetrates and coats stones, binding particles into a consolidated layer. This approach can stabilise loose gravel surfaces quickly while keeping the natural texture of the stone.
Definition and core components of pour on gravel binder
The product typically combines a polyurethane or polyurethane-acrylic hybrid resin with a catalyst or hardener. Clean, graded aggregates — often 2–6 mm — are used, whether newly laid or existing decorative gravel. Some manufacturers offer bonding primers for certain bases to improve adhesion.
Chemistry drives both mechanical grip and chemical adhesion between stones. Different resin formulations change flexibility, UV stability and abrasion resistance so installers can match performance to use, from domestic driveways to garden paths.
Key differences between pour on systems and resin bound finishes
Resin bound gravel is a wet-laid mix of resin and aggregate that creates a smooth, paved surface. That method yields a uniform, controlled thickness and engineered porosity when specified. Pour on systems bind pre-laid loose gravel in situ and often require less labour for refurbishment works.
Performance varies by design. Resin bound surfacing tends to give a neat paved look with predictable load capacity. Resin bound gravel vs pour on comparisons show that pour on options can be more cost-effective for stabilising substrates while retaining the loose-gravel character and preventing scatter.
Permeability can be achieved with both. Resin bound installations often have planned void content. Pour on binders usually preserve some drainage, depending on application rate and aggregate grading.
When to choose pour on systems over resin bound or resin bonded options
Choose pour on gravel binder where a solid, well-prepared gravel layer already exists and you want to stabilise loose gravel surfaces without full removal. It suits rapid refurbishments and projects where retaining a loose appearance matters.
Opt for resin bound or resin bonded systems when a smoother, paved appearance is required, or when higher load-bearing capacity and precise permeability engineering are essential, for example on heavy commercial driveways or public spaces.
A hybrid approach often works best: use resin bonded edging or channels to create crisp borders, then apply a pour on resin solution for binding stones across the central area to combine neat edges with a stabilised finish.
Benefits of using pour on gravel binder for driveways and paths
Pour on gravel binder gives a stable, natural surface that suits UK gardens and driveways. It locks stones in place while keeping the look of loose gravel. That balance makes it popular for homes where appearance and practicality matter.
Durability and long lasting resin bound gravel finish
Pour on systems greatly increase wear resistance by binding aggregates together. The binder reduces stone displacement under tyre and foot traffic, cutting dust and rutting.
Typical lifespans under normal UK domestic use range from five to fifteen years or more, depending on product, traffic and maintenance. UV-stable resins help prevent yellowing and embrittlement over time.
Permeable gravel surface system and drainage advantages
Many pour on finishes retain permeability so rainwater can percolate through the surface. That quality supports Sustainable Drainage Systems (SuDS) and reduces surface runoff in heavy British rain.
Correct aggregate grading and accurate application rates keep porosity intact. Too much resin will lower permeability and may affect planning requirements.
With a properly prepared base, you get less pooling and improved frost-thaw resilience on driveways and paths.
Styling options for garden paths, patios and driveways
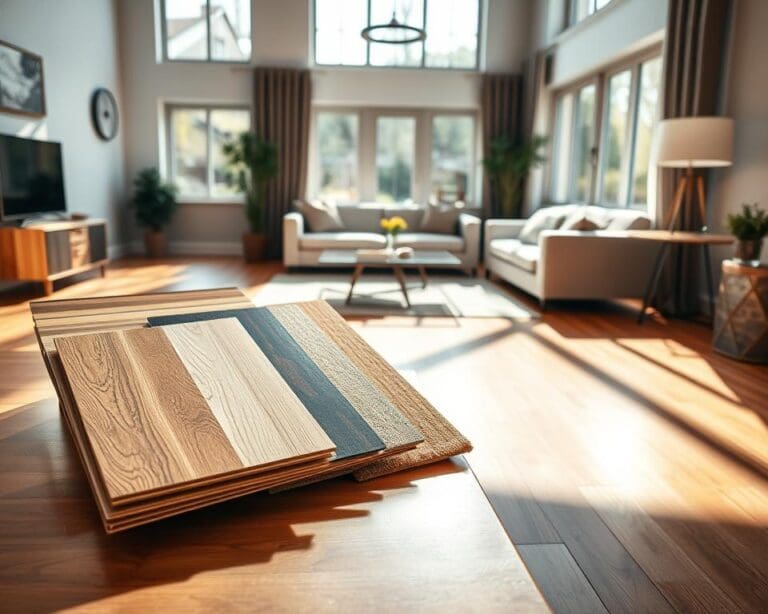
Choose from natural flint, granite, limestone, recycled coloured aggregates or decorative chips. These options allow varied colours and textures while retaining a loose-gravel look.
Edging choices, such as timber, brick or resin-bonded paving, add definition. The binder preserves the natural aesthetic, which contrasts well with neat resin bonded slabs for borders.
Eco friendly gravel binder solution and maintenance requirements
Some systems use low-VOC polyurethane resins and extend surface life, cutting the need for replacement materials. Permeability reduces runoff and supports garden ecology.
Routine sweeping removes debris and prevents compaction. Attend to weeds at edges and carry out spot repairs where heavy wear appears. Manufacturers often recommend re-coating intervals to maintain performance.
In the UK take care with de-icing salts on some resin-bound finishes and clear leaves promptly to avoid staining and organic breakdown.
How pour on gravel binder works: step-by-step process
A successful pour on gravel binder installation begins with careful planning and neat execution. The following steps give a clear, practical pathway from base work to final checks. Each stage matters for a durable, attractive finish that performs well in British weather.
Preparing the base and stabilising loose gravel surfaces
Start by creating a consolidated sub-base such as MOT Type 1 and set a sensible fall for drainage. Edge restraints must be fitted to stop lateral movement. Compact any existing gravel to an even depth and remove loose fines that could clog the surface.
Clear debris, organic matter and weeds. Use a stiff rake and a blower or vacuum to remove dust. Typical top-layer depths for domestic driveways are 25–40 mm, though you should follow manufacturer guidance from reputable suppliers such as The Resin Bonded Slab Company for exact figures.
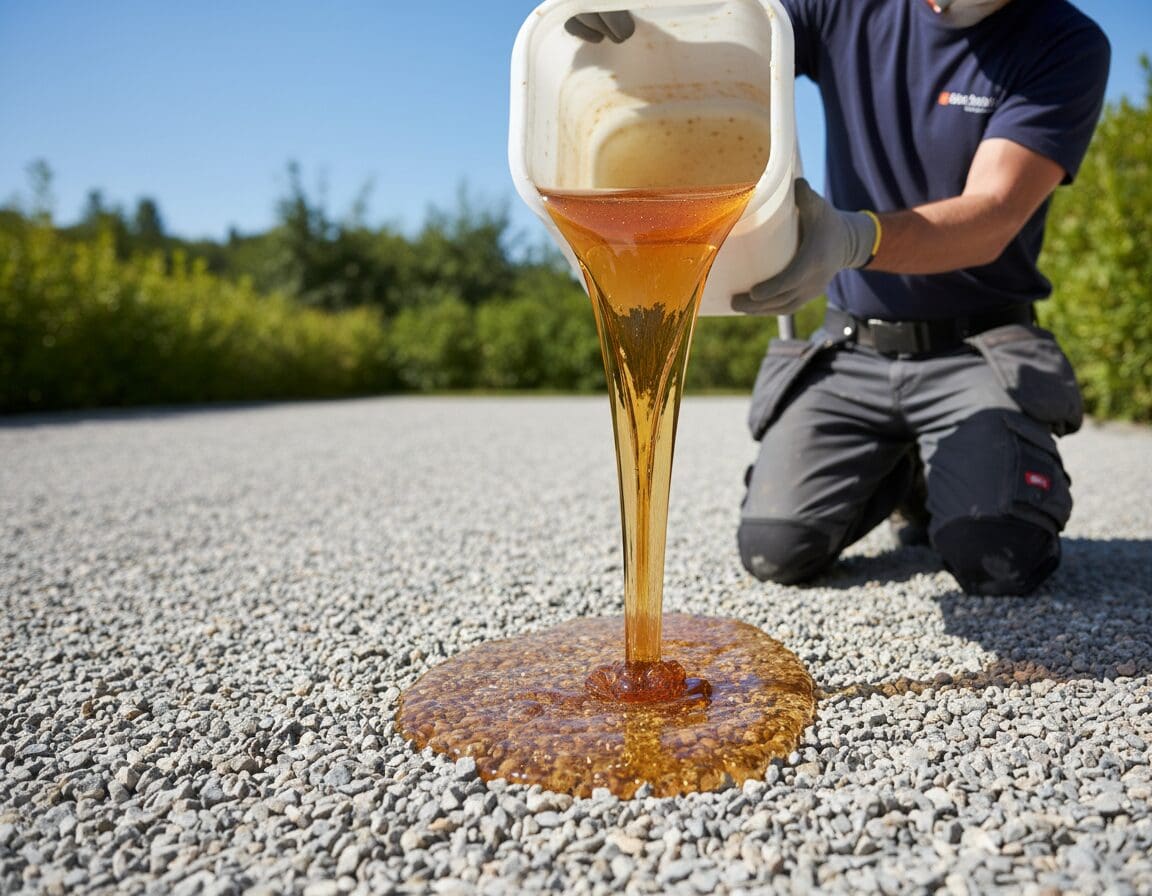
Mixing and application of the resin solution for binding stones
Measure resin and hardener precisely and mix with a mechanical mixer to the ratio the manufacturer specifies. Store components at recommended temperatures to keep performance consistent. Use protective clothing, gloves and respirators when the safety data sheet advises.
Apply the mix by pouring, spreading and squeegeeing to ensure even coverage. Choose a skim coat when light stabilisation suffices and full saturation for a stronger bind. Use edge tools to finish joins and ensure stones sit uniformly in the binder.
Curing times, weather considerations and quality checks
Expect an initial set in a few hours and a full cure within 24–72 hours depending on temperature, resin type and humidity. Lower temperatures or high moisture will lengthen curing times, which is common in UK spring and autumn.
Apply only within the recommended temperature window, often 8–25°C, and avoid rain or frost. Carry out simple checks: pull tests at edges, a light spot load to confirm compaction, and a visual inspection for pooling or uneven distribution.
Common issues during installation and how to avoid them
Frequent problems include poor base preparation leading to subsidence, over-application that reduces permeability, and under-mixing that leaves uncured patches. Rain during cure can spoil adhesion and finish.
Mitigate risk by following mixing ratios precisely, doing a small test patch, fitting firm edge restraints and using correctly graded aggregate. Remedial work may involve local sanding, re-application after preparation or calling a professional installer for larger defects.
DIY gravel binder for landscaping and professional installation tips
Small projects such as narrow garden paths, modest patios and low-traffic courtyard areas are well suited to DIY gravel binder for landscaping. Homeowners who are confident with manual mixing and who can pick a clear weather window will find pour on systems manageable. Suppliers including theresinbondedslabcompany.co.uk often supply pour on gravel binder DIY on theresinbondedslabcompany.co.uk kits with guidance, but remember that warranty terms and long‑term performance can improve with experienced installers.
Before you start, gather correct grade aggregate, a pour on resin kit (resin and hardener), an electric mixer, squeegees, edge restraints, a compactor, broom and PPE: gloves, goggles and a suitable respirator. Follow COSHH guidance when handling resins, dispose of waste responsibly and check SuDS and local planning rules if permeability is affected. Key gravel binder installation tips are to verify drainage and falls, prepare and compact the base, and work in small batches to respect pot life.
For larger driveways, sites with heavy vehicular load or complex drainage, consider professional installation pour on gravel binder. Vet installers by checking certifications, a portfolio of resin-bound and pour on projects, references and adequate insurance. Ask for a site survey, written method statement, product data sheets and a clear curing and aftercare plan. These quality assurance items protect both performance and any manufacturer guarantees.
Aftercare is straightforward: clean regularly with a stiff brush or low‑pressure washer, treat oil stains promptly and avoid harsh chemicals. Keep product data sheets and installer contact details to hand; many manufacturers and suppliers provide technical support and warranty information. With careful planning and these gravel binder for garden paths and patios tips, you can achieve a durable, attractive finish whether you choose DIY or a professional installation.